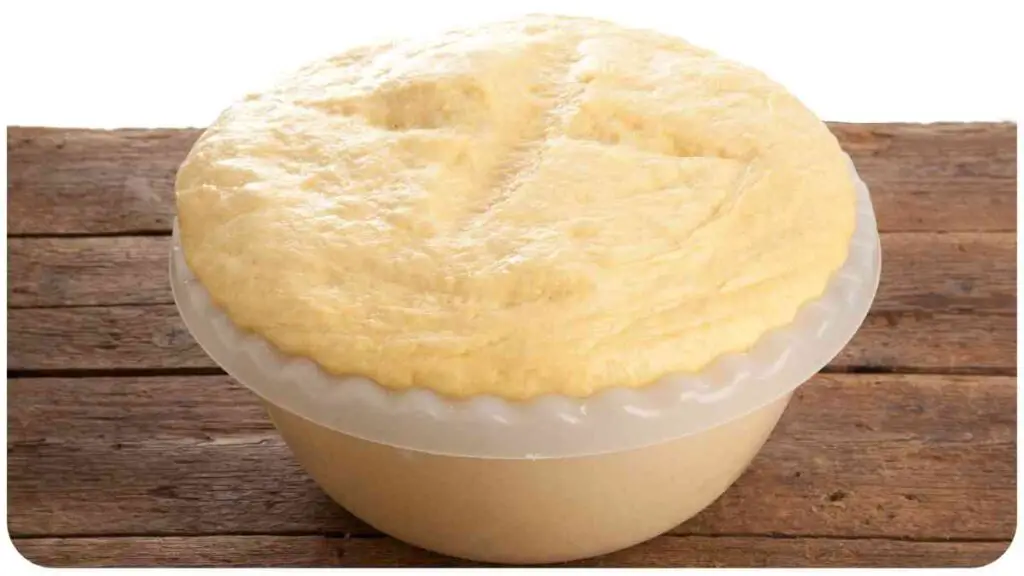
Bread baking is a delightful art form with its aroma wafting through the kitchen, creating anticipation and satisfaction. But there are times when your bread doesn’t rise as expected, leaving you with a dense and disappointing loaf.
Fear not! In this article, we will troubleshoot the common reasons behind bread not rising and provide you with practical tips to help you achieve a perfectly risen loaf every time.
| Takeaways |
| – Check the expiration date and use fresh yeast. |
| – Activate yeast in warm water with a pinch of sugar. |
| – Allow the dough to rise until it doubles in size before baking. |
| – Store yeast in an airtight container in the refrigerator. |
| – Use ingredients at room temperature for better yeast activity. |
| – Knead the dough for at least 8-10 minutes until it becomes elastic. |
| – Utilize the heel of your hands to push and stretch the dough. |
| – Allow the dough to rest for a short period between kneading intervals. |
| – Opt for bread flour with higher protein content for better gluten development. |
| – Provide a warm environment for the dough to rise. |
| – Use water with a temperature of around 105°F for yeast activation. |
| – Preheat the oven properly and use an oven thermometer for accurate readings. |
| – Regularly check expiration dates and replace any expired ingredients. |
| – Gently handle the dough to prevent excessive deflation during shaping. |
| – Monitor the proofing process and make adjustments as needed. |
Understanding the Bread Baking Process

Before diving into troubleshooting tips, it’s important to understand the bread baking process. Bread rising occurs due to the action of yeast, and various ingredients play a crucial role in this process. Let’s look at the key ingredients involved in bread rising.
Understanding the process of fermentation in food is crucial for successful bread making. Fermentation plays a vital role in achieving the desired rise and texture of your bread. Explore the basics and improve your baking skills.
The Key Ingredients for Bread Rising
Table 1 showcases the key ingredients required for bread rising:
| Ingredient | Role |
| Flour | Provides structure and gluten formation. |
| Yeast | Ferments the dough and produces carbon dioxide for rising. |
| Liquid | Activates yeast and hydrates the dough. |
| Sugar | Feeds the yeast and enhances fermentation. |
| Salt | Controls yeast activity and adds flavor. |
| Fats and Oils | Tenderizes the bread and affects moisture retention. |
Understanding the roles of these ingredients helps in troubleshooting potential issues with bread rising.
The Role of Yeast in Bread Rising

Yeast, a living organism, is responsible for the fermentation process that causes bread to rise. When activated, yeast consumes sugars and produces carbon dioxide gas, which creates air pockets in the dough. This gas expansion leads to the desired rise in bread.
Common Reasons for Bread Not Rising
There are several factors that can contribute to bread not rising as expected. Let’s explore some common reasons and how to address them:
- Inactive Yeast: When yeast is expired or not properly activated, it fails to produce enough carbon dioxide for a good rise. Troubleshooting tips for inactive yeast are outlined in Table 2.
- Insufficient Kneading: Proper kneading develops gluten, which helps capture and hold carbon dioxide gas during fermentation. Insufficient kneading can result in poor rise. Refer to Table 3 for troubleshooting tips.
- Poor Temperature Control: Yeast is highly sensitive to temperature. If the environment is too cold or too hot, it can hinder yeast activity and, consequently, bread rising. See Table 4 for tips on addressing poor temperature control.
- Using Expired Ingredients: Using expired yeast or other ingredients can negatively impact bread rising. It’s essential to check expiry dates and use fresh ingredients. Refer to Table 5 for troubleshooting tips.
- Overproofing or Underproofing: Proving, or allowing the dough to rise before baking, is crucial. Overproofing can lead to a collapsed or dense loaf, while underproofing results in insufficient rise. Table 6 provides troubleshooting tips.
By identifying these common issues and implementing the appropriate troubleshooting measures, you can overcome the challenges of bread not rising.
Experiencing a burnt soup disaster? Learn how to fix a burnt soup with easy recovery methods. Just as with bread, sometimes cooking mishaps happen, and knowing how to salvage a meal is invaluable.
Troubleshooting Tips for Bread Rising Issues
Inactive Yeast
When yeast is inactive or expired, it can result in bread that fails to rise adequately. Here are some troubleshooting tips to address this issue:
Table 2: Troubleshooting Tips for Inactive Yeast
| Issue | Troubleshooting Tips |
| Expired yeast | Always check the expiration date and use fresh yeast. |
| Improper hydration of yeast | Activate yeast in warm water (around 105°F) with a pinch of sugar. |
| Insufficient proofing time | Allow the dough to rise until it doubles in size before baking. |
| Inappropriate storage conditions | Store yeast in an airtight container in the refrigerator. |
| Cold ingredients or water | Use ingredients at room temperature for better yeast activity. |
Implementing these tips will help revive the yeast and improve the rising potential of your bread.
Insufficient Kneading
Kneading is a critical step in bread-making, as it develops gluten and improves the structure of the dough. Here are some troubleshooting tips for insufficient kneading:
Table 3: Troubleshooting Tips for Insufficient Kneading
| Issue | Troubleshooting Tips |
| Inadequate kneading time | Knead the dough for at least 8-10 minutes until it becomes elastic. |
| Improper kneading technique | Utilize the heel of your hands to push and stretch the dough, then fold it |
| Inadequate gluten development | Allow the dough to rest for a short period between kneading intervals. |
| Using low-protein flour | Opt for bread flour with higher protein content for better gluten development. |
By addressing these issues and kneading the dough properly, you’ll improve the gluten formation and ensure a better rise in your bread.
When dealing with bread ingredients, understanding food expiration dates is essential. Freshness matters in baking, so grasp the comprehensive guide to make informed choices in your bread-making process.
Poor Temperature Control
Yeast is highly temperature-sensitive, and deviations from the ideal range can affect its activity. Here are some troubleshooting tips for poor temperature control:
Table 4: Troubleshooting Tips for Poor Temperature Control
| Issue | Troubleshooting Tips |
| Cold environment | Place the dough in a warm spot (around 75-85°F) to encourage yeast activity. |
| Hot environment | Avoid placing the dough in direct sunlight or near a heat source. |
| Incorrect water temperature | Use water with a temperature of around 105°F for yeast activation. |
| Inadequate proofing temperature | Maintain a warm environment (around 80-90°F) for proper dough rising. |
| Inconsistent oven temperature | Preheat the oven properly and use an oven thermometer for accurate readings. |
Proper temperature control will ensure yeast activity and enable optimal bread rising.
Using Expired Ingredients
Using expired ingredients, including yeast, can lead to poor bread rising. Here are some troubleshooting tips to avoid this issue:
Table 5: Troubleshooting Tips for Expired Ingredients
| Issue | Troubleshooting Tips |
| Expired yeast or other ingredients | Regularly check expiration dates and replace any expired ingredients. |
| Stale flour | Store flour in an airtight container to maintain freshness. |
| Rancid fats or oils | Use fresh and properly stored fats and oils for better results. |
| Outdated baking powder or soda | Check the expiration date and replace if necessary. |
| Stale or clumpy dry yeast | Store dry yeast in the refrigerator to maintain its freshness and quality. |
By using fresh and non-expired ingredients, you’ll ensure optimal bread rising.
Overproofing or Underproofing
Proving, or allowing the dough to rise, is crucial for achieving the desired texture and rise in bread. Here are troubleshooting tips for overproofing or underproofing:
Delve into ‘The Truth About Preservatives‘ and their impact on your food. In the context of bread, it’s crucial to comprehend how preservatives can influence your bread’s rise and overall quality.
Table 6: Troubleshooting Tips for Overproofing or Underproofing
| Issue | Troubleshooting Tips |
| Overproofed dough | Shorten the proofing time and check for signs of over-risen dough. |
| Underproofed dough | Increase the proofing time until the dough reaches double its original size. |
| Inconsistent room temperature | Provide a consistently warm environment for the proofing process. |
| Proper dough handling | Gently handle the dough to prevent excessive deflation during shaping. |
| Using a bread machine | Follow the machine’s instructions and keep an eye on the proofing process. |
By monitoring the proofing process and making adjustments accordingly, you’ll achieve optimal bread rising.
Bonus Tips for Successful Bread Rising
In addition to troubleshooting specific issues, there are some general tips that can help ensure successful bread rising. Let’s explore these bonus tips:
- Measuring Ingredients Accurately: Use a kitchen scale to measure flour and other dry ingredients by weight for precise measurements. Measuring liquids with graduated measuring cups ensures accuracy in hydration ratios.
- Creating an Ideal Environment for Rising: Provide a warm and draft-free environment for the bread to rise. You can preheat your oven to the lowest setting, turn it off, and place the covered dough inside to create a controlled warm space.
- Choosing the Right Type of Yeast: Different types of yeast, such as active dry yeast, instant yeast, or fresh yeast, have varying requirements and characteristics. Choose the type of yeast that suits your recipe and follow the instructions accordingly.
- Understanding the Impact of Flour: Different flours have different protein contents, which affect gluten formation and bread texture. Bread flour, with its higher protein content, is ideal for bread baking as it provides robust gluten structure.
- Techniques for Kneading Effectively: Develop a rhythmic kneading technique, applying adequate pressure to stretch and fold the dough. Use the heel of your hands, leaning your body weight into the dough, while keeping it moving. Knead until the dough is smooth and elastic.
By implementing these bonus tips along with the troubleshooting tips, you’ll significantly improve your bread rising success. Remember, practice makes perfect, and as you gain experience and expertise with bread baking, you’ll be able to troubleshoot and adapt to different scenarios more efficiently.
While discussing bread-making, the art of sushi-making can offer valuable insights. Learn ‘How to Roll Like a Pro’ when making sushi. Techniques from one culinary realm can often be applied to another, improving your baking skills.
Conclusion
Bread baking is both an art and a science, and sometimes the rising process can be a challenge. By understanding the key ingredients, troubleshooting common issues, and implementing the bonus tips shared in this article, you’ll elevate your bread baking skills to the next level.
Remember to check your yeast for freshness, knead the dough properly, control the temperature, use fresh ingredients, and monitor the proofing process. With a little patience and practice, you’ll be rewarded with beautifully risen bread that is sure to delight your taste buds.
So, the next time you encounter a loaf that refuses to rise, refer back to this article and troubleshoot with confidence. Enjoy the process, experiment with different recipes, and savor the joy of homemade bread that rises to perfection.
Further Reading
Here are some additional resources you can explore to deepen your understanding of bread rising issues and troubleshooting techniques:
- The Spruce Eats: Why Won’t My Bread Rise?: This comprehensive article provides an overview of common reasons behind bread not rising and offers troubleshooting tips to address each issue.
- Taste of Home: 9 Reasons Your Bread Isn’t Rising (and What to Do About It): In this helpful article, you’ll find nine possible causes for bread not rising, along with practical solutions to get your bread rising perfectly.
- WikiHow: How to Fix Dough That Won’t Rise: This step-by-step guide provides detailed instructions on troubleshooting dough that refuses to rise, offering tips and techniques to save your bread.
These resources offer additional insights and tips for troubleshooting bread rising issues. Enjoy further reading and expand your knowledge on this topic!
FAQs
Below are some frequently asked questions (FAQs) about troubleshooting bread rising issues:
Q: How can I tell if my yeast is still active?
A: To check if your yeast is active, dissolve it in warm water with a pinch of sugar. Within 5-10 minutes, the mixture should become frothy and bubbly, indicating that the yeast is active and ready to use.
Q: Can using cold water affect bread rising?
A: Yes, cold water can hinder yeast activity, resulting in poor bread rising. It’s recommended to use lukewarm water (around 105°F) to activate and hydrate the yeast properly.
Q: Why does bread sometimes collapse after rising?
A: Bread may collapse after rising if it is overproofed or if it lacks proper support during the baking process. Overproofing allows too much gas buildup, which causes the bread’s structure to weaken and collapse.
Q: Is it necessary to preheat the oven for bread rising?
A: No, it is not necessary to preheat the oven specifically for bread rising. The dough should be proofed in a warm, draft-free environment. Preheating the oven is generally done just before the baking process.
Q: Can using whole wheat flour affect bread rising?
A: Whole wheat flour contains more bran and germ, which can interfere with gluten formation and reduce bread rising. To improve rising, it is recommended to use a combination of whole wheat flour and bread flour or add vital wheat gluten to the dough.

Hi, I’m Hellen James! I’m a professional chef who has been cooking for over 12 years. In my career, I’ve worked at some of the world’s most prestigious hotels and restaurants. My expertise lies in creating recipes that are simple but delicious, and I love to experiment with new ingredients and techniques. I started this blog because I want to share my passion for cooking with everyone who loves food as much as I do.


