Welcome to our guide on how to sharpen your kitchen knives! In this article, we will provide you with easy DIY tips to help you maintain sharp and efficient knives in your kitchen. Having a sharp knife is crucial for achieving precision, speed, and safety while cooking.
Let’s dive into the world of knife sharpening and explore the best practices to keep your knives in peak condition.
| Takeaway |
| Proper knife sharpening and maintenance are essential for optimal cutting performance and kitchen safety. |
| Understanding the different tools, grit levels, and techniques will help you choose the right method for sharpening your kitchen knives. |
| Regular honing between sharpening sessions helps maintain the sharpness of the knife’s edge and prolong its lifespan. |
| Follow safety precautions and handle sharp knives with care to prevent accidents. |
| Proper storage, such as using a knife block or sheath, and educating household members about knife safety are crucial. |
2. The Importance of Sharp Kitchen Knives
Having sharp kitchen knives is essential for every home cook or professional chef. Sharp knives not only make your cutting tasks easier and more efficient but also promote safety in the kitchen. When a knife is dull, you tend to exert more force, making it more likely to slip and cause accidents.
Dull knives can also lead to uneven cuts and compromise the presentation of your dishes. By regularly sharpening your kitchen knives, you can enhance your culinary experience and elevate your cooking skills.
To become a kitchen knife expert, mastering different techniques is essential. From proper grip to precise cuts, this comprehensive guide teaches you everything you need to know about knife skills. Sharpen your knowledge and blades to elevate your culinary prowess
3. Understanding Knife Sharpening

Before we delve into the techniques and tools, let’s understand the basics of knife sharpening. The primary goal of sharpening is to create a fine and keen cutting edge on the blade. This is achieved by removing a small amount of metal from the knife’s edge to reveal a new, sharp surface. It’s important to note that honing and sharpening are different processes. Honing simply realigns the edge, while sharpening removes material to establish a new edge.
4. Common Tools and Techniques for Knife Sharpening
4.1 Whetstones
Whetstones, also known as sharpening stones, are one of the most popular tools for sharpening kitchen knives. They come in various grit options, ranging from coarse to fine, and provide excellent control over the sharpening process. Whetstones require soaking in water before use, and the blade is then moved across the stone’s surface at a consistent angle.
Embark on your cooking journey with confidence by exploring meal planning. This beginner’s guide will help you organize your kitchen adventures, allowing you to save time, reduce waste, and enjoy delicious meals every day. Sharpen your skills in the art of planning and cooking
Table 1: Whetstone Grit Guide
| Grit Level | Use | Description |
| Coarse (120-400) | Restoring extremely dull blades or repairing nicks | This level of grit will remove a significant amount of material, making it ideal for blades that require a lot of work. |
| Medium (800-1200) | Regular sharpening maintenance | Medium grit removes small nicks and maintains a general level of sharpness. It’s suitable for routine sharpening sessions. |
| Fine (2000-3000) | Honing and refining edges | Fine grit stones are used for achieving a razor-sharp edge after the initial sharpening. They help with edge refinement and maintenance. |
| Extra Fine (4000+) | Polishing and final touches | Extra fine grit stones deliver a mirror-like polish and are considered optional for most kitchen knives. These stones are prioritized in professional settings or by enthusiasts seeking the ultimate edge. |
4.2 Knife Sharpening Systems
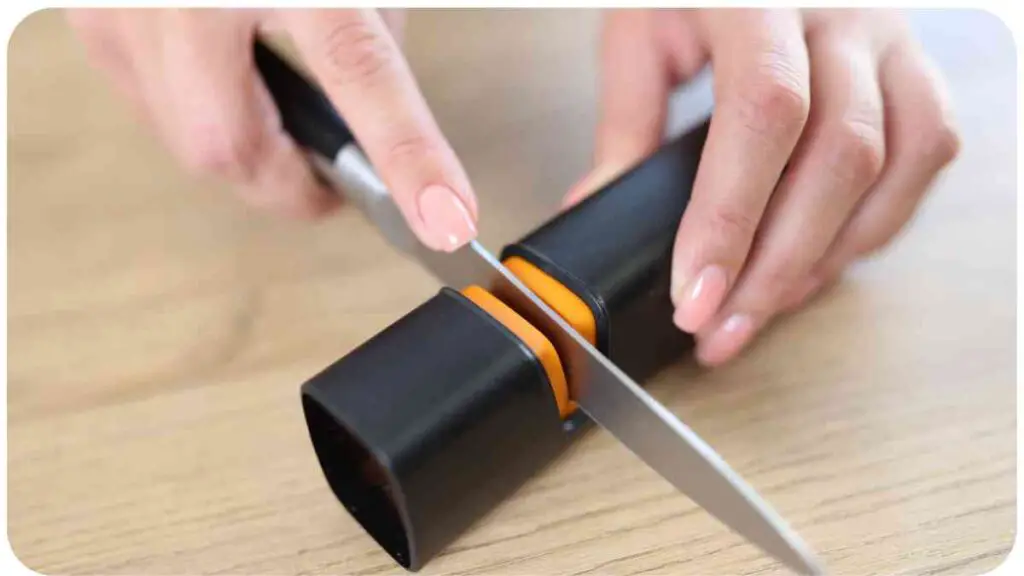
Knife sharpening systems provide steady support for your knife during the sharpening process. They consist of a fixed or rotating base with an adjustable angle guide. These systems are helpful for beginners or those who prefer more control and stability while sharpening.
4.3 Honing Rods
Honing rods, also known as sharpening steels, are essential for maintaining the sharpness of your knives between sharpening sessions. Unlike sharpening, which removes metal, honing rods realign the blade’s edge, ensuring optimal cutting performance. They are commonly made of steel or ceramic and come in various sizes and textures.
Spices possess the power to transform ordinary dishes into extraordinary culinary delights. Discover the wonders of diverse herbs and spices and learn how to use them strategically in your recipes. Sharpen your spice knowledge and awaken new flavors in your cooking.
Table 2: Honing Rod Materials and Their Benefits
| Material | Benefits |
| Steel | Suitable for regular maintenance, aligning the edge quickly |
| Ceramic | Ideal for fine-tuning and polishing the edge |
4.4 Electric Knife Sharpeners

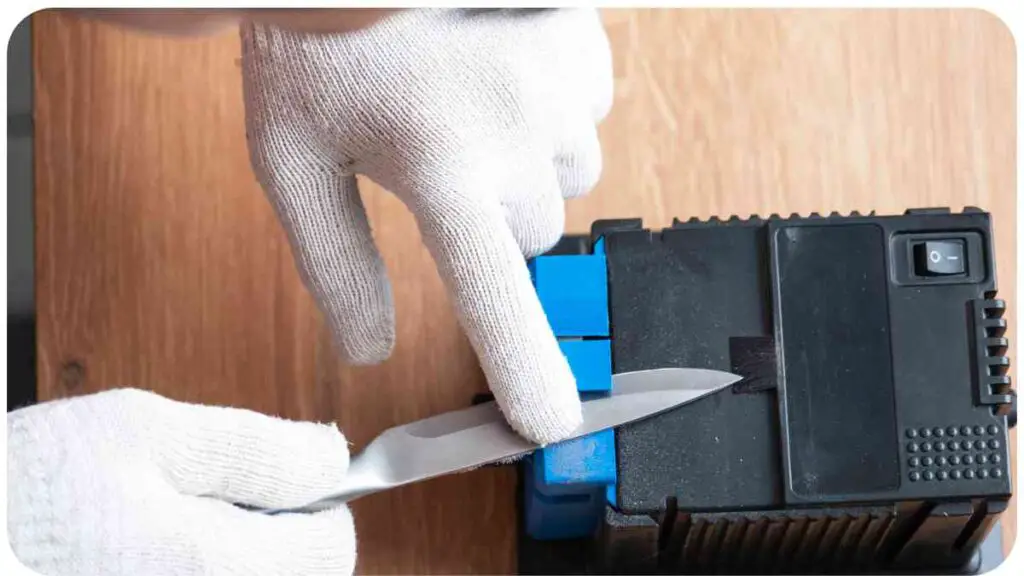
Electric knife sharpeners are convenient tools that automatically sharpen your knives. They feature rotating abrasive wheels or belts that remove metal to sharpen the edge. Electric sharpeners are easy to use and produce consistent results. However, they are not recommended for knives with thin or delicate blades, as they may compromise the knife’s tempering.
Table 3: Popular Electric Knife Sharpeners and Their Features
| Brand | Model | Features |
| Chef’s Choice | Model 15 XV | 3-Stage EdgeSelect sharpening system, 15-degree angle for Asian-style knives, 20-degree angle for European- and American-style knives, advanced flexible spring guides for accurate control, diamond abrasive wheels for efficient sharpening |
| Work Sharp | Culinary E5 | Precision sharpening, flexible abrasive belts, guided sharpening, variable speed control, built-in vacuum to collect debris, compatibility with a wide range of knives |
| Presto | 08810 Professional Electric Knife Sharpener | Three-stage sharpening system, blade guides for optimal sharpening angles, adjustable blade thickness selector, easy to use, suitable for both straight and serrated knives |
| Lansky | Deluxe 5-Stone Sharpening System | Five sharpening hones, controlled-angle sharpening system, color-coded for easy use, stone holder with angle guide, durable and versatile |
Note: When choosing an electric knife sharpener, consider your specific needs and the type of knives you own to ensure compatibility and optimal results.
Effortless home cooking is within reach with the right kitchen gadgets. From efficient knife sharpeners to time-saving appliances, this curated list provides essential tools for a seamless cooking experience. Sharpen your collection of kitchen gadgets and elevate your culinary efficiency.
5. Sharpening Stone Grit Guide
To achieve the best results when sharpening your kitchen knives, it’s essential to understand the different grit levels of sharpening stones. Here’s a guide to help you choose the appropriate grit for your needs:
Table 4: Sharpening Stone Grit Guide
| Grit Level | Use | Description |
| Coarse (120-400) | Restoring extremely dull blades or repairing nicks | This level of grit is ideal for blades needing significant work. It removes material efficiently to reshape and repair the edge. |
| Medium (800-1200) | Regular sharpening maintenance | Medium grit stones maintain the edge and remove minor nicks. They are suitable for routine sharpening sessions. |
| Fine (2000-3000) | Honing and refining edges | Fine grit stones refine and hone the edge, making it sharper and more precise. They are crucial for achieving a razor-sharp edge. |
| Extra Fine (4000+) | Polishing and final touches | Extra fine grit stones deliver a mirror-like polish and add the ultimate touch of sharpness and refinement. They are used by professionals or enthusiasts seeking the highest level of precision. |
By understanding the different grit levels, you can select the appropriate sharpening stone for your specific needs and desired results.
6. Step-by-Step Guide to Sharpening Your Kitchen Knives
Now that we have explored the tools and grit levels, let’s dive into a step-by-step guide on how to sharpen your kitchen knives effectively:
Table 5: Steps to Sharpen Your Kitchen Knives
| Step | Description |
| Step 1 | Gather the necessary tools: a sharpening stone or system, lubricant (water or honing oil), and a towel or non-slip mat. |
| Step 2 | Determine the sharpening angle based on your knife’s manufacturer specifications or personal preference. |
| Step 3 | Prep the sharpening stone by wetting it with water or applying honing oil, following the manufacturer’s instructions. |
| Step 4 | Hold the knife’s handle firmly and position the blade against the sharpening stone at the chosen angle. |
| Step 5 | Using light pressure, move the knife across the stone in a sweeping motion, maintaining a consistent angle and applying equal pressure on each stroke. |
| Step 6 | Repeat this process on both sides of the blade, alternating between strokes to ensure even sharpening. |
| Step 7 | Periodically check the sharpness of the blade by lightly running your finger over the edge, keeping caution to avoid injury. |
| Step 8 | Once you achieve your desired level of sharpness, wash the knife to remove any metal particles and residue. |
| Step 9 | Finish the sharpening process by lightly honing the knife using a honing rod to align the edge. |
| Step 10 | Test your newly sharpened knife by making precise cuts on various ingredients. Enjoy the improved cutting experience! |
Following these steps will help you sharpen your kitchen knives effectively and maintain optimal cutting performance.
7. Honing Your Knives for Maintenance
In addition to regular sharpening sessions, honing your kitchen knives is crucial for maintenance and keeping them in peak condition between sharpenings. Honing helps to realign the micro-edge of the knife, ensuring consistent cutting performance. Here’s a simple process to hone your knives:
Maintain the freshness of your ingredients by utilizing the best practices for storing fruits and vegetables. From temperature control to proper packaging, this guide ensures that your produce remains flavorful and lasts longer. Sharpen your knowledge of storage techniques and enhance your ingredient preservation skills
Table 6: Steps to Hone Your Kitchen Knives
| Step | Description |
| Step 1 | Choose the appropriate honing rod based on your knife’s maintenance needs. Steel rods are suitable for regular maintenance, while ceramic rods provide fine-tuning. |
| Step 2 | Hold the honing rod vertically, ensuring a firm grip and stable positioning, with the tip of the rod placed on a steady surface. |
| Step 3 | Angle the knife’s blade against the rod at a 15-20 degree angle, making sure to maintain a consistent angle throughout the process. |
| Step 4 | From the heel to the tip of the blade, slide the knife down the rod while gently applying pressure to contact the entire edge of the blade. |
| Step 5 | Repeat this process on both sides of the blade, alternating strokes to maintain an even edge. |
| Step 6 | After honing, carefully clean your knife to remove any metal particles or residue. |
| Step 7 | Your knife is now honed and ready to use! It will exhibit improved cutting performance and precision. |
Remember to hone your kitchen knives regularly, preferably before each use, to maintain their sharpness and prolong their lifespan.
8. Storing and Handling Sharp Knives

Proper storage and handling of sharp knives are essential to ensure their longevity and prevent accidents. Here are some important tips to keep in mind:
Table 7: Tips for Storing and Handling Sharp Knives
| Tip | Description |
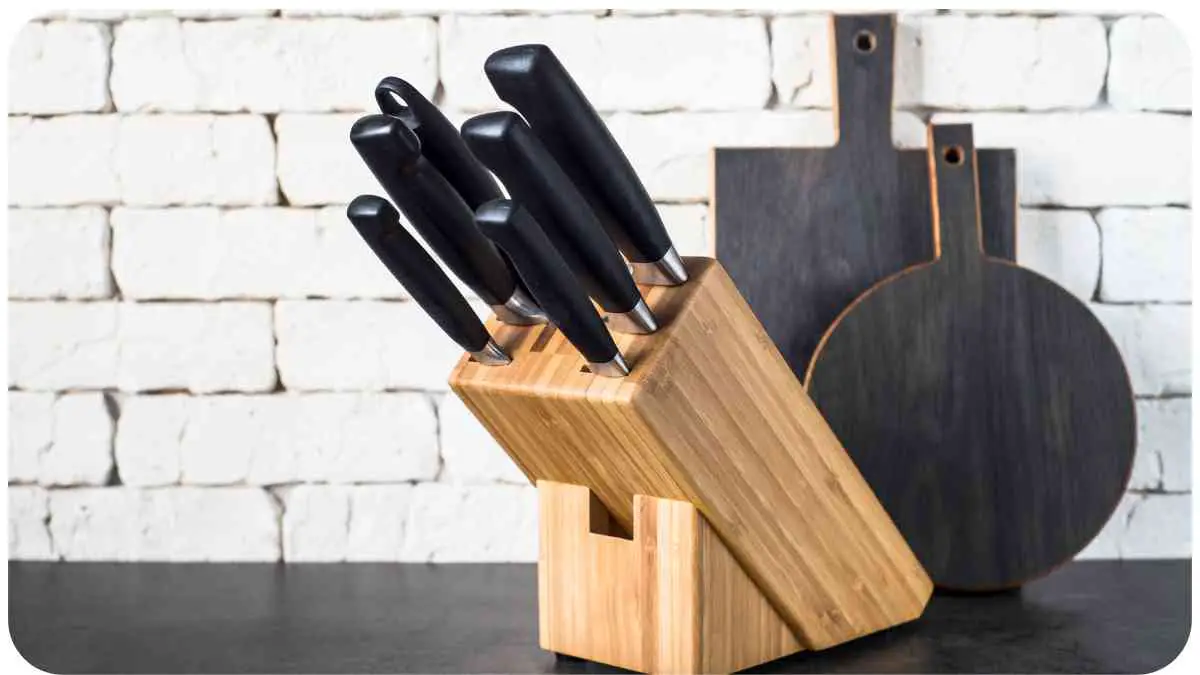
| Tip 1 | Store knives in a knife block, a magnetic strip, or a knife sheath to protect the blades and prevent accidents. Avoid storing them loosely in drawers where they can come into contact with other objects and become dull or damaged. |
| Tip 2 | Handle knives with care, always maintaining a firm grip and being mindful of their sharpness. Avoid using excessive force or placing them in precarious positions that could lead to accidents. |
| Tip 3 | Never use knives on hard surfaces or to cut through frozen foods, as this can damage the blades. Instead, use appropriate tools or allow frozen foods to thaw before cutting. |
| Tip 4 | Clean knives immediately after use with warm, soapy water and a sponge or cloth. Avoid harsh abrasives or scouring pads, as they can scratch the blade surface. |
| Tip 5 | Dry knives thoroughly after washing to prevent water spots and potential corrosion. Consider using a knife block or knife guard to safely store them while they dry. |
| Tip 6 | Regularly inspect knives for any signs of damage, such as chips or bent blades. If damaged, refrain from using the knife and seek professional assistance for repair or replacement. |
| Tip 7 | Educate household members about the proper handling and storage of sharp knives, particularly if there are children present. Keep knives out of reach and use child-proof locks on drawers if necessary. |
Following these tips will help you maintain the sharpness and functionality of your knives while prioritizing safety in the kitchen.
9. Safety Precautions
Knife sharpening involves handling sharp tools, so it’s crucial to take appropriate safety precautions to minimize the risk of accidents. Here are some safety measures to consider:
Table 8: Knife Sharpening Safety Precautions
| Precaution | Description |
| Precaution 1 | Always work in a well-lit and properly ventilated area to ensure visibility and prevent inhaling harmful particles. |
| Precaution 2 | Wear cut-resistant gloves to protect your hands from accidental slips and possible cuts. |
| Precaution 3 | Ensure a stable work surface and secure the sharpening stone or system to prevent it from slipping during use. |
| Precaution 4 | Maintain a consistent angle during sharpening to prevent accidental slips and uneven sharpening. |
| Precaution 5 | Be mindful of your fingers’ placement and avoid placing them in a vulnerable position where they might come into contact with the blade. |
| Precaution 6 | If using an electric knife sharpener, carefully follow the manufacturer’s instructions and safety guidelines for usage. |
| Precaution 7 | Keep your workspace clean and free from clutter to minimize distractions and avoid accidents. |
By adhering to these safety precautions, you can ensure a safer knife sharpening experience and reduce the risk of any injuries.
Conclusion
Sharpening your kitchen knives is a crucial skill that enhances your culinary experience and promotes safety in the kitchen. By understanding the different tools, grit levels, and techniques, you can maintain sharp and efficient knives for precise cutting and enjoyable cooking sessions.
Remember to follow safety precautions, handle and store your knives properly, and regularly hone and sharpen them to maintain optimal performance. Happy cooking with your sharpened kitchen knives!
Further Reading
Here are some helpful resources to further enhance your knowledge about knife sharpening and maintenance:
- How to Sharpen a Knife – Allrecipes: This article provides step-by-step instructions and useful tips for sharpening various types of kitchen knives.
- Easy Hacks to Keep Kitchen Knives Sharp – The Indian Express: Discover simple yet effective hacks to maintain the sharpness of your kitchen knives in this article.
- How to Sharpen a Knife – wikiHow: wikiHow offers a comprehensive guide on knife sharpening, including different techniques and methods suitable for beginners and experienced users.
FAQs
Q: Can I use a sharpening stone on ceramic knives?
A: Sharpening stones are not recommended for ceramic knives as they require specialized diamond-coated sharpening tools or professional sharpening services due to their brittle nature.
Q: How often should I hone my kitchen knives?
A: Honing can be done regularly, even before each use. Many professional chefs hone their knives before every task to ensure optimal performance.
Q: Can I sharpen my knives with a honing rod alone?
A: Honing rods are used to maintain the sharpness of knives between sharpening sessions, but they do not remove metal like sharpening stones. Eventually, knives will require sharpening on a stone or using a sharpening system.
Q: Can I sharpen scissors using the same methods as kitchen knives?
A: Scissors have different blade angles and structures compared to kitchen knives, requiring specialized sharpening tools specifically designed for scissors. It’s best to consult the manufacturer’s instructions or seek professional assistance for sharpening scissors.
Q: Are electric knife sharpeners suitable for all types of knives?
A: Electric knife sharpeners vary in design and functionality. While many can handle a wide range of knife types, it’s important to check the manufacturer’s specifications to ensure compatibility, especially for knives with specific blade angles or serrated edges.

Hi, I’m Hellen James! I’m a professional chef who has been cooking for over 12 years. In my career, I’ve worked at some of the world’s most prestigious hotels and restaurants. My expertise lies in creating recipes that are simple but delicious, and I love to experiment with new ingredients and techniques. I started this blog because I want to share my passion for cooking with everyone who loves food as much as I do.


